This post and video we cover requirements and an overview of how to configure and provision a Cloud PC with Windows 365 Enterprise.
Licensing
We will start with licensing. There are two versions of Windows 365 (W365), Business and Enterprise. W365 Business is simple to deploy and the Cloud PC is Azure AD joined. There is no need for on-premises connections and provisioning policies. As such, there are no options available under Provisioning, Windows 365 in Microsoft Endpoint Management when W365 Business is used.
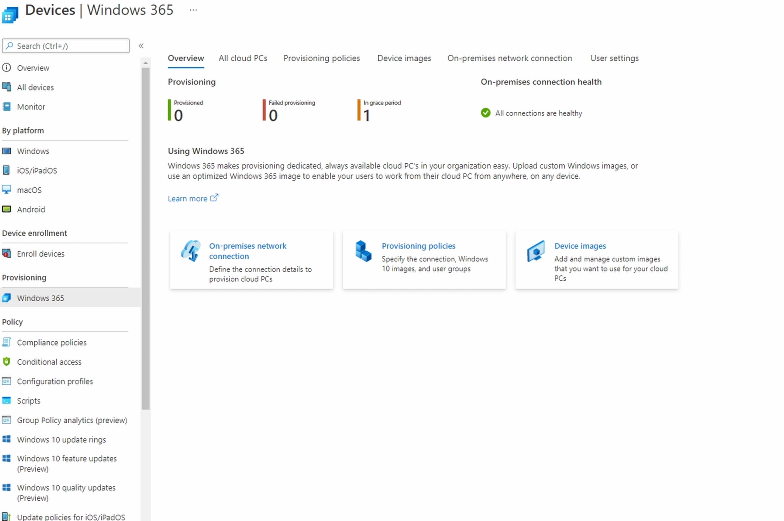
W365 Enterprise requires the Cloud PC to be domain joined. That requires a connection to a domain controller. The options to configure W365 Enterprise are located under Provisioning, Windows 365 in the Microsoft Endpoint Management portal. If you do not see options like what’s on the screen below, that indicates there are no W365 licenses in the tenant, or only W365 Business licenses applied. This post and video cover the prerequisites and walkthrough of W365 Enterprise.
Users need a Windows client and Intune licenses. The license can be applied individually or as part of a bundle. If using a bundle, verify the options meet the licensing requirement.
Requirements
Windows AD Domain Services – W365 Enterprise requires Windows AD Domain Services. Azure AD Domain Services will not work.
Hybrid Azure AD Join – Hybrid Azure AD Join has to be enabled in Azure AD Connect Sync. Verify hybrid join is enabled and the Windows AD OU used for the Cloud PC’s is included in any Azure AD Connect filters.
VNet Connectivity to Windows AD – A VNet and Subnet with connectivity to Windows AD is required. The VNet must be in a W365 supported region (W365 Regions). Add custom DNS to the VNet with the DNS server with your domain record, typically a Windows AD Domain Controller.
Domain Join Account – The W365 service requires an account with rights to join the Cloud PC to the domain. An admin account could be used, but it’s better to use an account with limited rights to join computers to the domain.
Windows AD Organizational Unit – This is optional but a good idea. An Organizational Unit (OU) can be specified in the provisioning policy for the Cloud PCs.
W365 Admin Rights – The account used to manage the W365 environment has to have a minimum of Intune Administrator role in the Azure AD tenant.
W365 Group – A group for W365 users is required when assigning a provisioning policy. W365 provisioning policies cannot be applied to an individual user.
Requirements Test
Deploy a Windows client computer to the VNet and Subnet used for Windows 365 as a way to test the requirements.
Once deployed, join the client computer to the domain using the domain join account used for W365.
If an OU is used for W365, move the Windows AD computer object to the OU and verify that the computer is Hybrid Azure AD joined. It will show as hybrid joined in Azure AD under devices such as shown below.

Hybrid Join depends on the object replicating to the domain controller used by Azure AD Connect and Azure AD Connect synchronization. Therefore, it could take over 30 minutes for that device to show as hybrid Joined.
If any of the above steps fail, the environment is not ready for W365 Enterprise. It is easier to address any issues with requirements individually before deploying W365 than to resolve problems with a W365 deployment.
Configure Windows 365 Enterprise
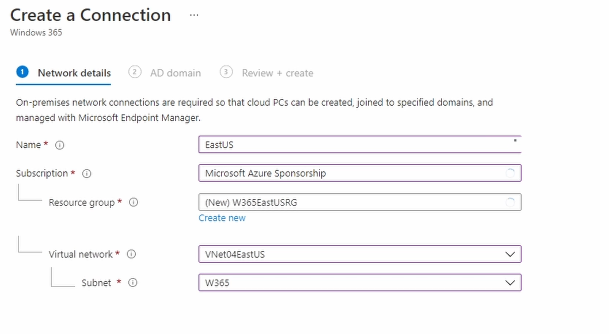
Create an On-premises network connection (OPNC) once the requirements are in place. This step defines the connection to your on-premises network and domain controller. Next, supply the VNet and subnet. If you don’t see the subnet, be sure the VNet was deployed to a supported region.
Add the Domain, OU if used, and the domain join account on the next screen.
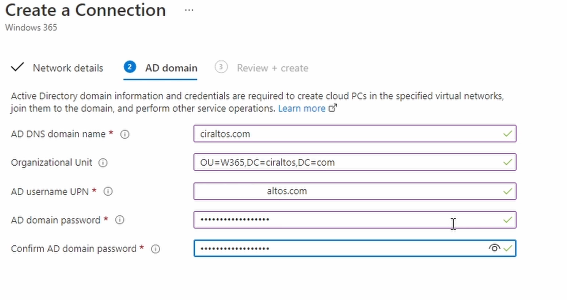
Once finished, review and create to complete the OPNC setup.
It can take several minutes for this step to finish. As part of the process, a computer object is created in Windows AD, and a test verifies the computer object is Hybrid Azure AD Joined. Depending on replication time, that step may fail with an Azure AD Device Sync connection warning as shown below.

Retry the connection test after replication finishes, and the computer object is shows as hybrid joined in Azure AD if you get the message above.
Next, go to Provisioning policies and add a new policy. A provisioning policy defines specifics of the Cloud PC for the end-user.
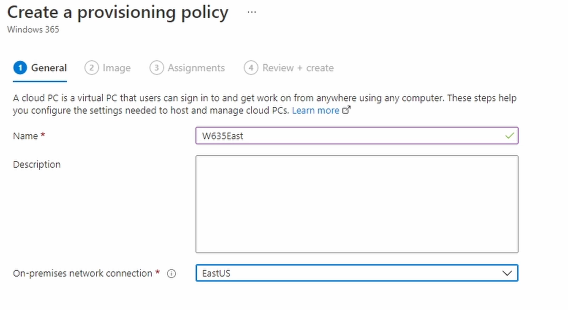
Give the policy a name and select the OPNC created in the previous step.
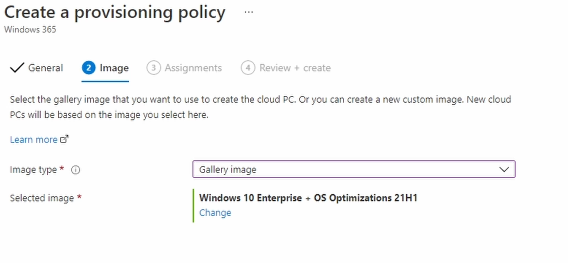
Under Images, select a Gallery Image type and choose an image to apply. Once selected, go to assignments.
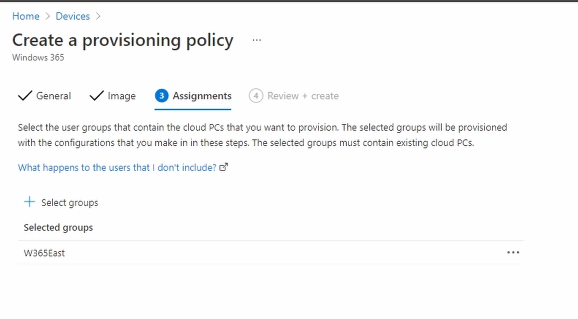
Select the group that contains the W365 users.
Go to review and create, and then create.
The last step is to give the user a license. Go to the license portal and give the user or users a Windows 365 license.
Once the license is assigned, go back to Endpoint Manager, Windows 365, and All Cloud PC’s. The Cloud PC will show as provisioning. The provisioning process can take close to an hour to finish. Once finished, the Cloud PC is available for the user to log in at cloudpc.microsoft.com.


