Overview
Azure Automation is Microsoft’s cloud-hosted automation solution. It uses Python or PowerShell based scripts, referred to as runbooks, to launch automation jobs in Azure or on-premises. These runbooks are started in multiple ways. The information below details starting automation jobs with a webhook.
Post updated with new content on 10/2/2022. Original 2018 video: https://www.youtube.com/embed/LYTE6gqSuSA
Webhook vs. API
To start, let’s go over the difference between a webhook and an API. Think of a webhook as one-way communication. Use email as an analogy. An email is sent with an assumption it gets to the destination, you may get a bounce message if it failed, but there is no way to know if it was received and read by the recipient. The email has information attached and it may result in some action, that action could be a reply or some other activity by the recipient.
An API, on the other hand, is interactive. Think of it as a chat service. You address the message to a user and the user will respond to the message based on the information sent. An API call is similar, information is passed to the API with the expectation of some type of data returned.
Webhook Formatting
Azure Automation runbooks can start with a webhook. A webhook is a custom URL passed to Azure Automation along with a data payload specific to the runbook. A runbook starts when a properly formatted HTTP Post message is sent. There may or may not be a confirmation depending on the runbook. For example, it could send a confirmation email or log an event.
The Azure Automation webhook is a URL that has three parts, The webhook name, the Request Header and Request Body. The Webhook Name is also included in the payload of the webhook.
URL – The address containing a security token used to call the Runbook.
Webhook Name – The name of the webhook is passed to the runbook.
Request Header – A hash table containing the header information for the webhook.
Request Body – Data passed to the runbook. The data can be a string, JSON or XML. The runbook must be able to consume the data type sent in the webhook.
The runbook examples below are kept simple for the sake of the demonstration. They use the Azure Automation output stream to display the data passed to the runbooks. We also use the data passed to the runbook in a simple loop. The goal of this exercise is to demonstrate what that data looks like and how it can be used once passed into the runbook from the webhook.
Create Webhook
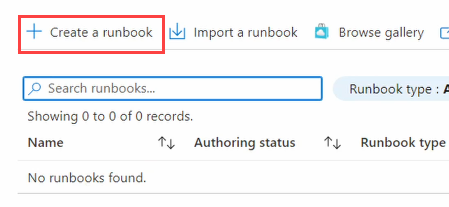
To begin, create a PowerShell runbook in an Azure Automation account and configure the Webhook. Leave the runbook blank for now and publish it before the next step.

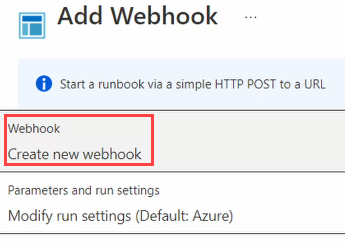
From the Runbook , select Add Webhook.

Select Create new webhook.
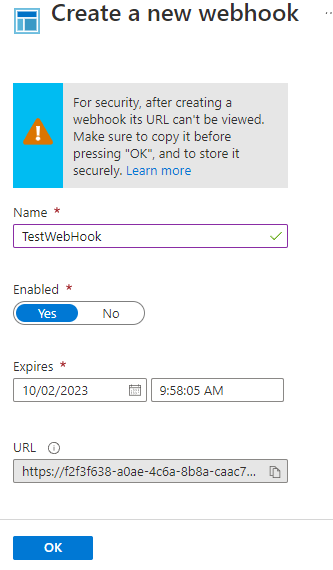
Create the new webhook by entering a name and set it to enabled. The webhook will expire in a year by default. Copy and save the webhook URL before finishing. As noted on the screen, you will not be able to view the webhook URL after clicking OK.
Leave the Modify run settings as default. Click Create to create the webhook
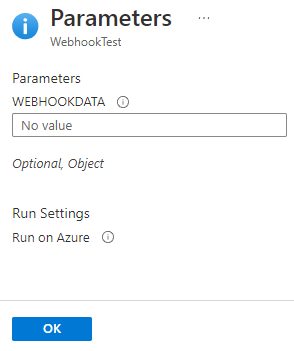
If Create is not active, you may need to open Parameters and run settings. Leave the Webhook data blank and click OK. The Create button will be active.
Simple Test
Start the first test by updating the runbook with the following code. Save, and publish the runbook when finished. This simple code outputs the values sent by the webhook to demonstrate how it is interpreted by the runbook.
param (
    [Parameter (Mandatory = $false)]
    [object] $WebHookData
)

if ($WebHookData){
    # Header message passed as a hashtable
    Write-Output "The Webhook Header Message"
    Write-Output $WebHookData.RequestHeader.Message

    # This is the name of the webhook when configured in Azure Automation
    Write-Output 'The Webhook Name'
    Write-Output $WebHookData.WebhookName

    # Body of the message.
    Write-Output 'The Request Body'
    Write-Output $WebHookData.RequestBody
}
else {
    Write-Output 'No data received'
}
The code below assembles the webhook and starts the runbook with the post method. A breakdown of each line is listed below with the complete code at the end of this section.
URI – The URL of the webhook
$uri = 'https://s1events.azure-automation.net/webhooks?token=y%ewxa2nN14Boruw3dbBfHQy%2fmG9bT7y'HeaderMessage – Table containing the header of the message
$headerMessage = @{ message = "StartedByTravis"}Data – This is the payload, or body data of the message. Sent as an array of key, value pairs. The runbook must be written to consume the data sent.
$data = @(
    @{ Name="Leia"},
    @{ Name="Luke"},
    @{ Name="Han"}
)
Request Body Conversion – The body is converted to JSON, a text data format passed to the runbook
$body = ConvertTo-Json -InputObject $dataPost – The code below posts the webhook with the PowerShell Invoke-Webrequest post method and holds the response in the $response variable. Next, it outputs the response.
$response = invoke-webrequest -method Post -uri $uri -header $headerMessage -Body $body -UseBasicParsing
$response
The complete code looks like what is shown below. Update the information, including the $uri value to match your environment. Run to code to view the output in Azure Automation.
$uri = '<Add Webhook URL>'
$headerMessage = @{ message = "StartedByTravis"}
$data = @(
    @{ Name="Leia"},
    @{ Name="Luke"},
    @{ Name="Han"}
)
$body = ConvertTo-Json -InputObject $data
$response = invoke-webrequest -method Post -uri $uri -header $headerMessage -Body $body -UseBasicParsing
$response
Next, go into the job to view the Job Summary. This area allows you to view the details of the job, including Errors and Warnings if they exist, inputs, outputs, and Logs.
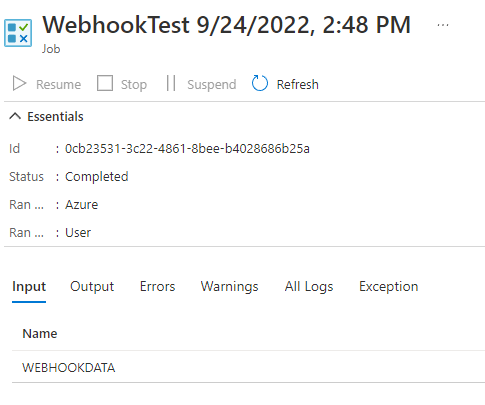
Go to Output to see the Output of the job.
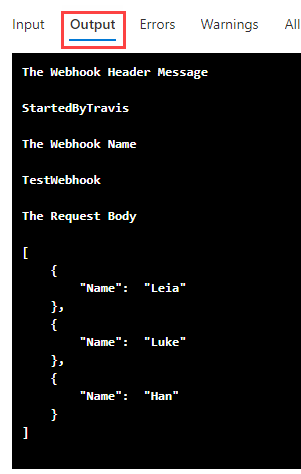
A window similar to the one above shows if successful. The Output includes the Webhook Header message passed to the runbook and the name of the webhook. The Request Body shows the JSON payload. This is okay, but it would be better to convert the JSON back to a PowerShell Object for use in the PowerShell Runbook?
Accessing Webhook Data
This example will take the above a step further by adding steps to convert the body data from JSON to a PowerShell object with the ConvertFrom-JSON command.
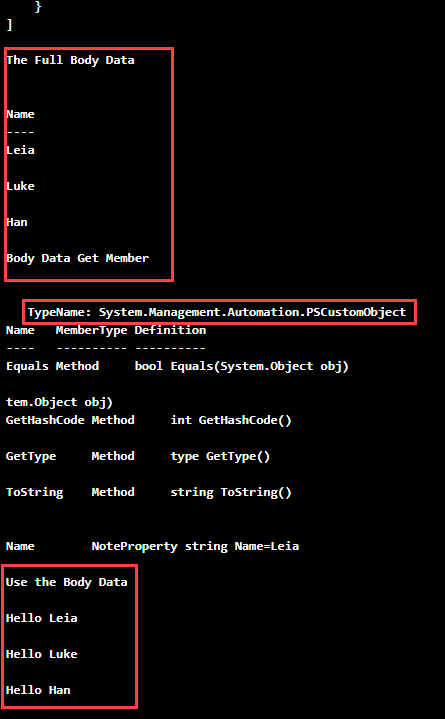
Next, the runbook displays the converted data then uses get-member to view the data type, confirming the data was converted to a PSCustomObject
Finally, a foreach loop is used to write the data passed into runbook to the screen. This demonstrates how we can create an array in PowerShell, convert it to JSON for the runbook, then convert it back to a PSCustomObject and use the data in the runbook
Update, save and publish the code below to the runbook for the next example.
param (
    [Parameter (Mandatory = $false)]
    [object] $WebHookData
)

if ($WebHookData){
    # Header message passed as a hashtable
    Write-Output "The Webhook Header"
    Write-Output $WebHookData.RequestHeader.Message

    # This is the name of the webhook when configured in Azure Automation
    Write-Output 'The Webhook Name'
    Write-Output $WebHookData.WebhookName

    # Body of the message.
    Write-Output 'The Request Body'
    Write-Output $WebHookData.RequestBody

    # Convert the body data from JSON
    $bodyData = ConvertFrom-Json -InputObject $WebHookData.RequestBody

    # View the full body data
    Write-Output 'The Full Body Data'
    Write-Output $bodyData

    #View the data type
    Write-Output 'Body Data Get Member'
    Write-Output ($bodyData | Get-Member)

    # Use the Body Data
    Write-Output 'Use the Body Data'
    foreach ($name in $bodyData.Name) {
        Write-Output "Hello $name"
    }
}
else {
    Write-Output 'No data received'
}
Next, run the webhook code to start the runbook again.
$uri = '<Add Webhook URL'
$headerMessage = @{ message = "StartedByTravis"}
$data = @(
    @{ Name="Leia"},
    @{ Name="Luke"},
    @{ Name="Han"}
)
$body = ConvertTo-Json -InputObject $data
$response = invoke-webrequest -method Post -uri $uri -header $headerMessage -Body $body -UseBasicParsing
$response
The partial output from the above command is shown below. It shows the data after the conversation from JSON under The Full Body Data. It displays the output from the get-member command, showing the data is now a PSCustomObject. It also shows the output of the foreach loop.
That is the basics of Azure Automation webhooks. Runbooks are not limited to starting by a schedule, but can be triggered by webhooks to respond to events in your environment. Event driven runbooks provide flexibility and reliability for automation tasks.


5 thoughts on “Webhooks and Azure Automation Runbooks”
Thank you for posting such helpful information regarding webhooks & automatic runbooks. It will be helpful for beginners like me to learn such skills.
I will be looking forward to new updates.
I maybe confused. BUT I thought a webhook was a URL I could type into a browser to run a runbook. Just another URL to type into another powershell, whats the use? I just want to start the VM, rdp in and when finish another webhook to shutdown the VM. Seems this frustration webhoook aint the answer
man, that’s exactly what i’m trying to do. It does me know good to crate a runbook to run powershell, and then have to use powershell to invoke it. i guess there is a use case for that, but i just need a url that the sales guys can click on to start some demo vms.
Frustrated doesn’t begin to cover it.
Pingback: Setting Up Microsoft Azure Webhooks: 2 Easy Steps - Learn | Hevo
Thanks for share this informative article. create a PowerShell runbook in an Azure Automation account and configure the Webhook. Leave the runbook blank for now and publish it before the next step. From the Runbook blade, select Webhooks under Resources and Add Webhook. Create the new webhook by entering a name and set it to enabled.