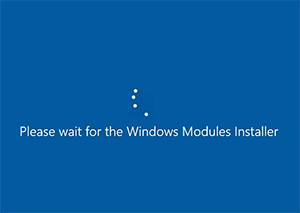
I do not like to wait; who does? So, getting a ten-minute delay logging into VM’s with the message “Please Wait for the Windows Modules Installer” was frustrating. There is a way to speed this up, and that is what this post is about. In this post and accompanying video, I show you how to bypass this message when creating a custom image, including with Azure Image Builder.
First, let’s consider what is happening. The message occurs during the first login after deploying a custom image prepared with Sysprep. The “Please Wait for the Windows Modules Installer” message does not indicate an error; it is scanning the system and installing any required drivers.
If, however, the image is coming from the same hypervisor it is deployed to, say Hyper-V, for example, there is a way to tell it to use the same system configuration as the source for any VM’s created from the image. this is done during the Sysprep on the image source bypassing the /Mode:VM switch.
The /Mode:VM switch tells Sysprep that the image is for VM’s on the same hypervisor. Sysprep sets the image to use the same system settings, bypassing the scan that causes the “Please Wait for the Windows Module Installer.
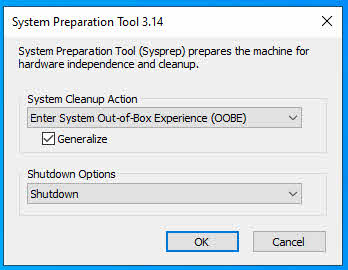
The /Mode:VM command is passed as a command-line argument. As you can see by the Sysprep GUI below, there is no option for /Mode:VM in the Sysprep interface.

There are a few things to know when using the /Mode:VM switch. The switch does not work with all other Sysprep options. Below is the list of options supported with /Mode:VM:
/generalize
/oobe
/reboot
/shutdown
/quit
Also, the /Mode:VM option is only available for Virtual machine images, and the image should only be used on the same hypervisor. Use the /Mode:VM switch for Hyper-V, VMWare, Azure, AWS or any other hypervisor, but do not use the same image across different hypervisors.
To run the command interactively to generalize and shut down a computer to prepare it for an image, run the command below:
%WINDIR%\system32\sysprep\sysprep.exe /generalize /shutdown /oobe /mode:vm
Azure Image Builder
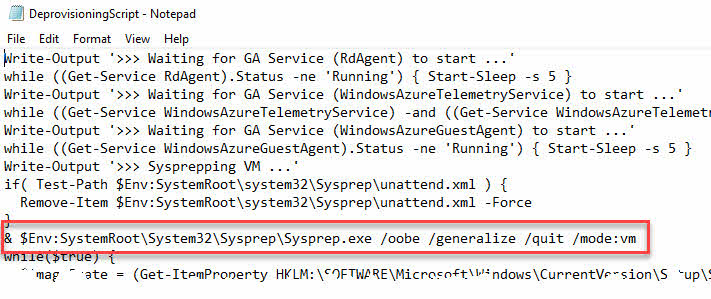
If using Azure Image Builder, the process is a little different. Image Builder uses a script called DeprovisioningScript.ps1, located at the root of the C:\ drive that runs the Sysprep command during the image build process.
For more information on Azure Image Builder, check out my video series located here.
The Sysprep command used for the image build includes the /oobe /generalize /quiet and /quit options.

To use the /Mode:VM option, that file is updated during the build process to change the Sysprep command to use /oobe /generalize /mode:vm and /quit. Notice that /quiet is not included because that option is not available when using the /Mode:VM option. Also, the /Shutdown command is not used. Image Builder will take care of the shutdown process.
Now, the question becomes how to update this file to include the new Sysprep options. It is possible to create an updated DeprovisoningScript.ps1 file, download the file to the build VM with other install media, and then copy it to the C:\ drive, overwriting the existing file. Or you could use a script file to replace that line of text in the file with the updated command.
For this example, I add a PowerShell customizer in the deployment template. The code runs an inline command to replace the existing Sysprep.exe options with new options. The chuck of JSON code used to update the file is below. Insert this in the customizer section to edit the Sysprep command with the new options.
{
 "type": "PowerShell",
 "runElevated": true,
 "name": "DeprovisioningScript",
 "inline": [
   "((Get-Content -path C:\DeprovisioningScript.ps1 -Raw) -replace 'Sysprep.exe /oobe /generalize /quiet /quit','Sysprep.exe /oobe /generalize /quit /mode:vm' ) | Set-Content -Path C:\DeprovisioningScript.ps1"
  ]
 },
I hope that helps speed up the process of deploying VM’s with custom images!


3 thoughts on “Please Wait for the Windows Modules Installer”
Pingback: WVD Weekly Blog post 13th December – 20th December 2020 - WVD Community
Hi Travis, great videos you are making here and it’s helping a lot of people
2 questions please:
If I am building my templated via Azure DevOps pipeline how can I insert this like of code on the “Azure VM Image Builder Test(Preview)
” template?
How can I rename the image definitions created by Azure VM Image Builder Test(Preview)> they get these numbers which is not really helpful to understand the build included (0.24763.35243 (myaibsig01/win10wvd/0.24763.35243)
Many thanks again, really appreciate your help and efforts
Pingback: How to create a Windows Server 2022 (AVD) image with Azure Image Builder and deploy it to Azure Virtual Desktop - Tunecom