
In my first post, I made the bold statement that I would leave Branch and Fork out of this series because as a Sysadmin and loan scripter, I simply don’t need that functionality. However, I didn’t feel that this would be a complete series on Git if I didn’t spend some time on Git Branch and Fork. At a minimum, it is helpful to understand what it is and how it works.
Click here to see other articles in this series.
Fork
First up is Fork. Think of a Fork as a fork in a road, a single path that splits and goes to two different destinations. In literal terms, a Fork creates a new repository based on other projects commit. If you find an interesting script on GitHub and wanted to copy and update it for your environment, forking the code would accomplish that goal.
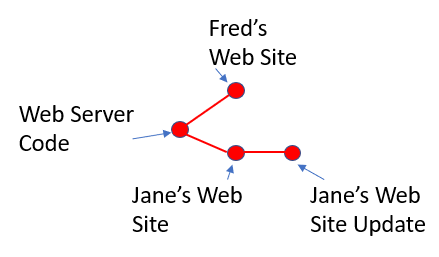
Each dot in the image below references a commit. For example, the first dot is code for a generic web server. Fred forks the code and builds a web site. Jane does the same and commits and additional update. Fred and Janes don’t know each other or plan to ever merge their web sites. They simply started with the same web server code.
As a demonstration, I fork a sample GitHub repository. The actual repository is not as important as the process. Start by logging into GitHub and finding the repository to Fork. In the upper right-hand side of GitHub is a Fork icon, click that to start the process.

A message appears indicating the Repo is being Forked.
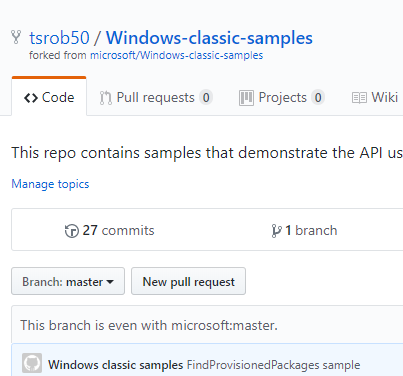
Now the Repository is part of my account. I can clone, update and commit just as with any other Repository.
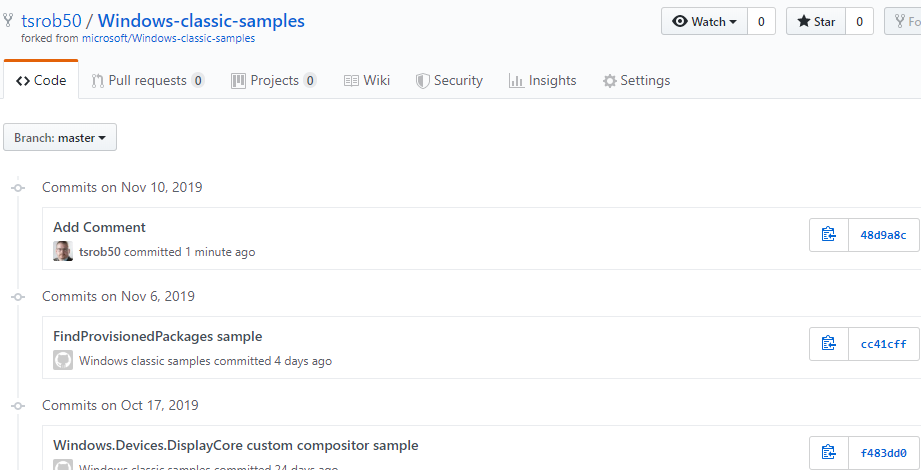
Below shows a new commit added to the Forked Repository. Notice that all the past history is still part of the repository, but only changes to my forked repository will show going forward.
Branch
Sticking to the road analogy, think of a Branch as a detour. It may split from the source path for a while, but the intent is that it will merge back eventually. A Branch starts at a commit of the Master Branch. For example, Let’s say there was a script that saves a CSV file to the local drive. It works, but it would be better if it sent the file by email. You, or someone else, could create a Branch to add a function to send the CSV file by email. The Master Branch is left untouched while the new Branch is updated and tested. Once that is tested and working, the Branch is merged back into the Master.
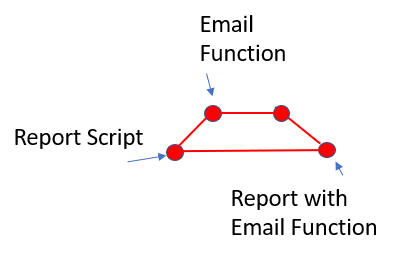
A Branch start and end with commits to the Master Branch. This is an important distinction between Branch and Fork. Branches are intended to merge back into Master, while Forks become their own thing.
To create a Branch in Visual Studio Code, start by opening the repository to Branch and open the Command Palette by pressing Crtl + Shift + P (Cmd + Shift + P on Mac) and type Git: Create Branch.

Next, enter the name of the Branch. The name “Feature-1” is used in this example.

After that type Master for the Branch

The Branch was created and VSCode is working with the new Feature-1 Branch. This is indicated in the bottom left-hand corner. The icon Changed from Master to Feature-1.

Now that the new Branch has been created, make a change to the script, save and commit the change as outlined in my previous article here. Run the command git show-branch –a in the VS Code terminal to display the Branches in the repository. Notice there are two shown.
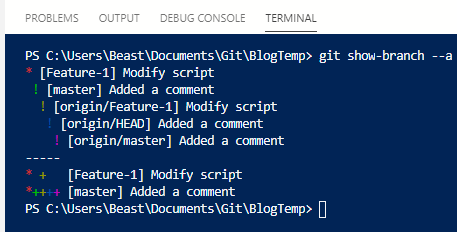
At this point in our hypothetical scenario, the code has been Branched, changes made and everything tests good. It’s time to merge the Feature-1 Branch back to the Master Branch for all the world to enjoy.
Start by changing back to the Master Branch. This is an important step. Merging happens in to a Branch. If this step is missed, the next step will merge Master to the Feature-1 Branch. To switch to the Master Branch, type git: checkout in the VS Code Command Palette. The next window shows the list of available Branches. Select Master and continue.
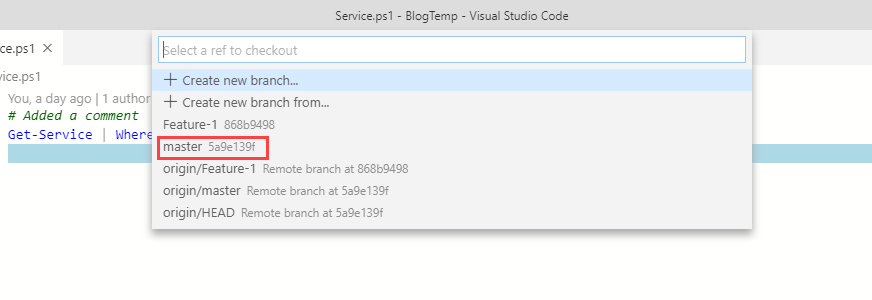
The editor is now in the Master Branch. Master should display at the bottom left of the VS Code window.
Start the merge process by typing git: merge Branch in the VS Code Command Palette. Next, select the Branch to merge, Feature-1 for this example. That finishes the merge process.
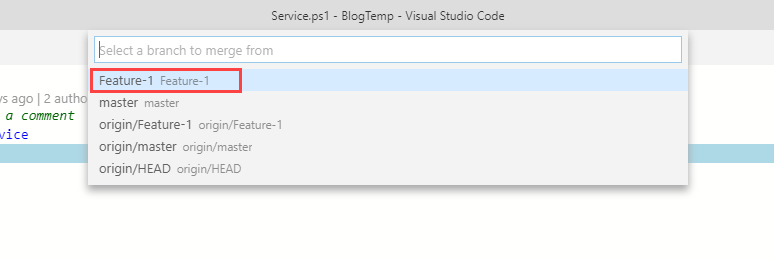
The Feature-1 Branch has been merged and is no longer needed. The next step is to remove it. To do so, start by going to the VS Code Command Palette and type git: branch delete. Select the Branch to delete in the next screen. The only Branch available is Feature-1 in this example. That deletes the Branch.

Run the git show-branch –a command to show the existing Branches. Notice the commit from Feature-1 shows as part of the Master Branch, but there is only one Branch.
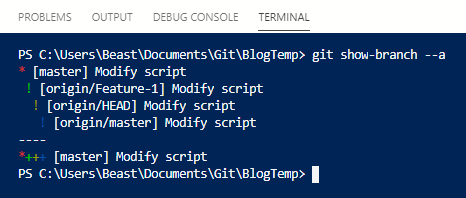
Although we did not push changes to a remote repository, all changes could be pushed to and would be reflected in a remote repo.
Conclusion
Forking is good for “borrowing” someone else’s code. Forking makes it easy to copy and modify other scripts to fit your needs. It’s worth understanding how it works.
A best practice for developers is to create and modify code Branches and merge them back to Master when complete. This makes sense for a multi-developer environment where code review and tracking take place.
I almost never create Branches. Being the only one using my scripts, it’s just easier to edit in the Master Branch. However, creating a separate Branch provides the ability to make and test changes without impacting the production Master Branch. Branching may be a good habit for even lone scripters to get into for larger or critical scripts.


